How Ad Insertion Works in AttentIQ
AttentIQ automatically analyses your content and places ads at the positions where your readers are most engaged. Here is how to get started and how to fine-tune placement for each post.
Step 1 — Enable Ads on a Post
Before any ads will appear on a post, you need to enable them. Open the post in the WordPress editor and look for the AttentIQ panel in the right-hand sidebar. You will see the Enable Ads toggle on the right side, next to the scan button — switch this on to activate ad placement for that post.

Note for users upgrading from an older version: This toggle was previously labelled Auto Ads. It works the same way — simply make sure it is turned on for each post where you want ads to appear.
Step 2 — AttentIQ Recommends Slots Automatically
Once ads are enabled, AttentIQ evaluates the post against a set of criteria — including content length, structure, and attention data collected from real visitors. If the post meets the minimum requirements, the recommended ad slots will activate automatically. You do not need to configure anything manually for ads to start showing.
AttentIQ supports three ad slots per post:
- Header — placed at the top of the post, before or just after the first paragraph
- In-Content — placed at the paragraph with the highest reader attention
- Footer — placed after the last paragraph
Which slots are shown depends on the scores AttentIQ calculates for each position. A slot will only show if its score is high enough to indicate a good placement opportunity. The best-performing slot is highlighted automatically.
Step 3 — Fine-Tune Placement from the Meta Box
Every post has an AttentIQ panel in the post editor sidebar. This gives you full control over ad placement for that specific post without affecting any other posts or your global settings.
Attention Score
At the top of the panel you will see a score ring showing the overall attention score for the post, along with a view count indicator. If the post has enough visitor data the score is based on real attention tracking. If not, it is calculated from content analysis and will improve automatically as traffic builds.
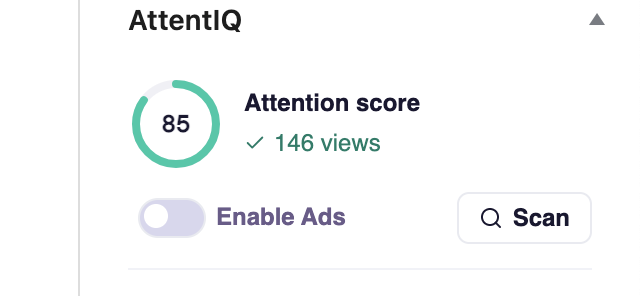
Scan Button
The Scan button analyses the post and recalculates all slot scores without reloading the page. Run a scan after publishing new content or making significant edits to make sure AttentIQ is working with the latest version of your post.
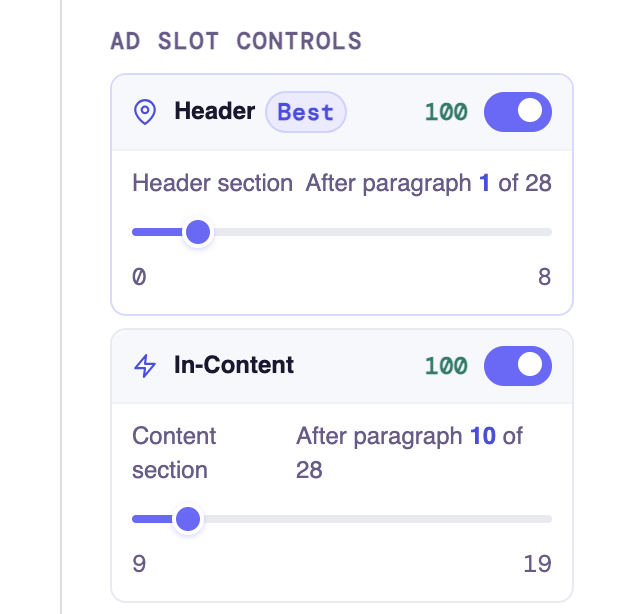
Ad Slot Controls
Below the score you will see a card for each active ad slot. Each card gives you two controls:
- Enable / Disable toggle — turn a specific slot on or off for this post. This overrides the automatic recommendation. If AttentIQ recommends a slot but you do not want it on this particular post, simply switch it off here.
- Position slider — each slot has a range of paragraphs it can be placed within. The header slot can be positioned anywhere in the first section of the post, the in-content slot within the middle section, and the footer slot within the final section. Drag the slider to move the ad to a different paragraph within that range. The current position is shown as you drag so you always know exactly where the ad will land. Slots are kept in separate sections so they can never overlap each other.
Click Save slot settings to apply your changes. Settings are saved per post and do not affect any other posts on your site.
View Full Insights
At the bottom of the panel there is a link to the full Post Insights page for that post. This opens a detailed view with heatmaps, scroll depth, slot viewability, revenue estimates, and more.
Global vs Per-Post Settings
Your ad codes, alignment settings, and lazy load preferences are configured globally in AttentIQ → Ad Slots. The meta box controls described above are per-post overrides — they let you adjust placement for individual posts without changing your global setup. If no per-post override is set, the post uses the global settings automatically.